


In case you missed it, in part 2 of this series, we discussed how to get better at push-ups once you have already nailed form down.
This article, part 3, will explore a few variations of the push-up, and ways to progress each variation within Phase 1 of the OPT Model, Stabilization Endurance Training.
Pushups and SAID
If you told your client that their next exercise was push-ups, would they be wondering which variation you were going to have them do this time to torture, er, challenge them, or would they automatically assume the position for the same type of push-up they’ve always done? There’s nothing wrong with a classic push-up, but once your client has mastered this move, there are infinite ways to progress it to keep them challenged and working toward their fitness goals.
The SAID (specific adaptation to imposed demand) principle, also known as the principle of specificity, is a principle stating that the body will adapt to the specific demands that are placed on it. When applied to push-ups, this simply means that your client’s body will adapt to the push-up variation and the acute variables (sets/reps/tempo/rest/frequency) that you have them do. Let’s look at what this means from a mechanical, neuromuscular, and metabolic standpoint.
Mechanical Specificity
Mechanical specificity refers to the weight and movements placed on the body. For example, high repetition, low weight movements produce muscular endurance, while low repetition, heavy weight movements produce muscular strength. The type of push-up and the acute variables that you use will cause a specific muscular adaptation.
Neuromuscular Specificity
Neuromuscular specificity refers to the speed of muscle contraction and exercise selection. Choosing unstable, yet controlled push-ups performed at a slower tempo will help a client develop stability. To develop strength, the push-up will be performed in a stable environment with a heavier load and moderate tempo.
Metabolic Specificity
Metabolic specificity refers to the energy demand placed on the body. Simply put: your client will burn more calories when rest periods are short. Adding push-ups as part of a circuit, with little to no rest between exercises, will keep them burning calories.
Pushup Progressions and Variations Explained
Incline – Many clients will start with this variation to build stability and muscular endurance around the shoulders and the lumbo-pelvic hip complex. The client will place their hands on a surface that’s higher than the ground. This could be a bench, countertop, or even a wall. The higher the surface, the lighter the load will be for your client.
Incline Pushup page on the NASM Exercise Library.
Regular – This is the standard push-up that most people picture with the hands and feet on the ground.
Decline - In this variation, the client places their feet on a surface higher than the hands. You could use a step, a bench, or a box to elevate the feet. The higher the elevation, the heavier the load will be for your client. Greater demand is placed on the shoulders in this position than in a regular or incline push-up.
Decline Push-Up NASM Exercise Library Page
Inverted - This very advanced progression requires excellent shoulder and core stability and strength. In this variation, the client will place their feet on an elevated surface that allows them to stack the hips over the shoulders, placing great demand on the shoulders and core.
Inverted Push-up NASM Exercise Library page
Progressing The Push-up for Stabilization Endurance
Before choosing a push-up progression for your client’s workout, it’s important to consider your client’s current phase of training, the goals of that phase, and how to progress the movement within that phase. In this article, we’re focusing on Phase 1: Stabilization Endurance Training.
What is Phase 1
Phase 1, Stabilization Endurance Training, is the starting place for all clients, no matter what their exercise background or experience. The goal of this phase is to develop the following adaptations:
Mobility and flexibility
Core and joint stabilization
Postural alignment and control
Muscular and aerobic endurance
To achieve these adaptations, your client will perform 12-20+ reps of each exercise for 1-3 sets, at a 4-2-1-1 tempo (slow: 4 seconds to lower, hold for 2 seconds, 1 second to press up, 1 second pause between reps) with little to no rest between exercises. New clients will train 2-3 days/week, intermediate clients 3-4 days/week, and advanced clients 4-6 days/week (using split routines if training 4+ days/week).
Benefits of Stabilization Endurance
Phase 1 helps our clients learn good form in all movement patterns while also improving any movement compensations that were identified during their movement assessments. Stabilization Endurance Training lays a vital foundation for moving well that is required before working on increasing strength and power. Think of Stabilization Endurance as the foundation of a house.
If you build a house on sand, it will likely fall. However, a house built on a solid foundation will continue to stand. The same goes for our clients, if we want to help them get faster and stronger, we need to first build a solid, stable foundation that can withstand strength and power challenges in the future.
How to Enhance Stabilization Training Alongside Pushup Training
With the goals of Phase 1 in mind, a client will not simply progress from an incline push-up, to regular, to decline, to inverted.
Instead, choose a variation that your client can perform with good form for 12-20 reps, and then progress that specific variation by first challenging the client’s proprioception, and then increasing the complexity of the movement over time. Specific ways to progress each variation within Phase 1 will be addressed later in the article.
Sample Pushup Program with Variations (Phase 1)
Push-ups can be integrated into your client’s regular workout using a circuit format. Here’s an example resistance-training program using incline push-ups:
| Exercise | Sets | Reps | Tempo | Rest |
| Incline Push-Ups | 2 | 15 | 4-2-1-1 | 0 |
| Step-Up With Single-Arm Bicep Curl | 2 | 15 Each Side | 4-2-1-1 | 0 |
| TRX Row | 2 | 15 | 4-2-1-1 | 0 |
| Hip Hinge With Sandbag | 2 | 15 | 4-2-1-1 | 0 |
| Scaption With Staggered Stance | 2 | 15 | 4-2-1-1 | 1 Minute |
Pushup Progression Examples:
Here are some examples of how to progress each push-up variation within Phase 1. These are not exhaustive examples, they are meant to be inspiration for creative ways to spice up the stabilization challenge for each variation!
Master the move: Make sure your client can perform the push-up variation while maintaining good body alignment first.
Hand/foot placement: A slightly wider foot stance will be easier than hip-width. Hands shoulder width apart will be more stable than staggered.
[Photo of different foot positions, and photo of staggered hand push-up]
Planes of motion: Have your client do traveling push-ups forward, backward, or side to side. Have your client take a small “step” with one arm and one leg in the desired direction and then perform the push-up. Keep hand/foot movements small and controlled.
[Photo or video of forward-backward push-up or side to side push-up]
Points of contact: Have your client try lifting one foot off of the ground (or box if using decline or inverted progression) during or immediately following the push-up to challenge their core and shoulder stability.
[Photo or video of one-foot push-up incline, regular, decline, inverted]
Modalities/props: After cycling through the above challenges first, consider incorporating unstable equipment. Here are a few examples:
Push-up Progression Examples
TRX Push-ups:
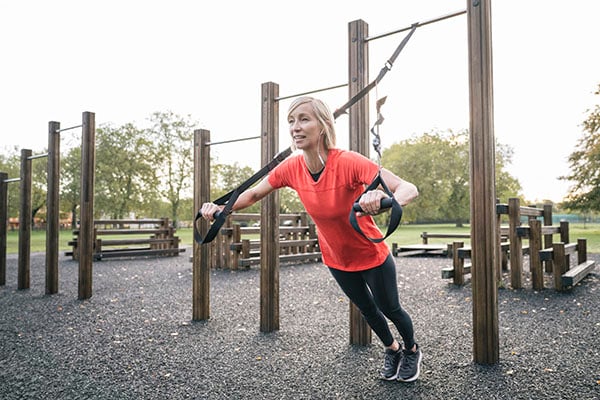
You can do these incline, inverted, or decline. They are a great movement and can spice up your pushup routine.
Stability Ball Push-up
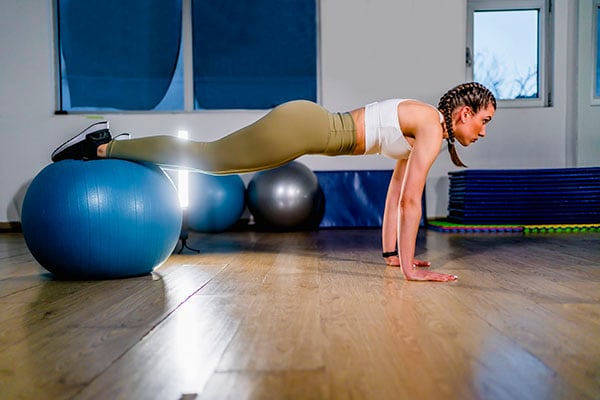
Stability ball: Place a stability ball under the hands or feet during the push-up (tip: start with the ball up against a wall for a little bit of added stability before progressing to free-standing)
Spiderman Push-up
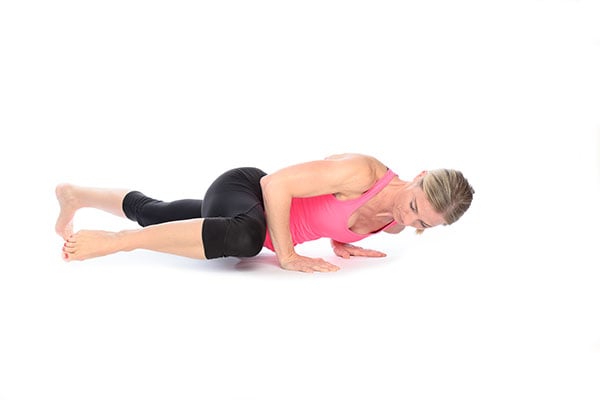
Spiderman pushups: As your client lowers into the push-up, have them pull one knee up toward the elbow. Hold that position for 2 seconds before returning to the top.
Summary
The best way to progress push-ups within Phase 1 is to first master the chosen variation, then find proprioceptive challenges to make that variation less stable (but still controlled!).
Next you can try adding a balance modality or prop, and then finally, add complexity to the movement. By following these progressions, your client will be challenged to the max in their Phase 1 push-up training.